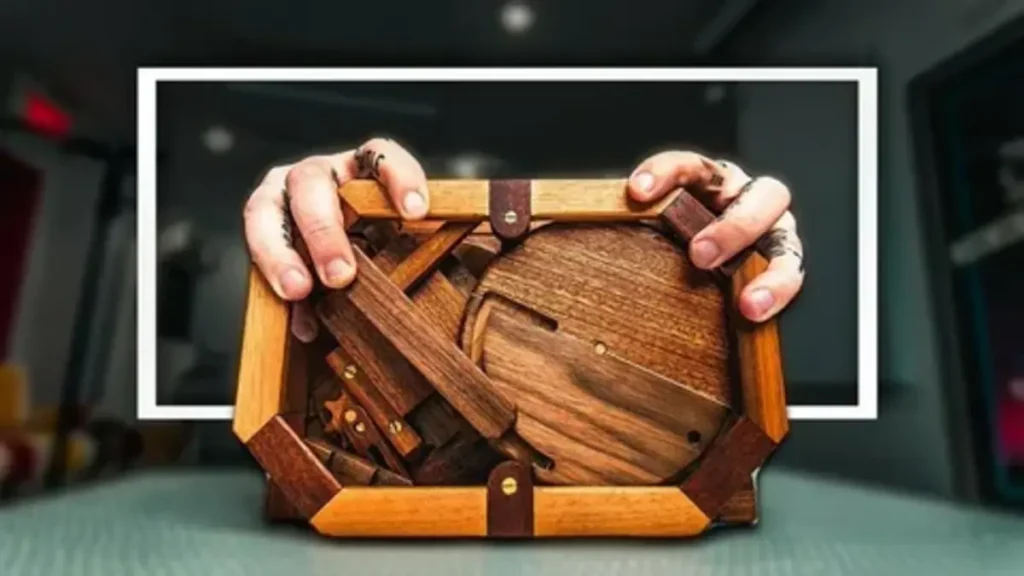
There is something deeply satisfying about a hidden compartment. Whether it is a secret drawer in an ancient desk or a modern trick vault, the human mind is naturally drawn to hidden spaces. While buying a pre-made mystery chest is easy, building a personalized, interactive vault with your own hands elevates the experience. Crafting an interactive container allows you to control the difficulty, choose the aesthetic, and build a truly unique gift or tabletop conversation piece.
Learning how to construct a diy puzzle box is a fantastic project for woodworkers, crafters, and puzzle enthusiasts alike. By mastering a few basic structural principles, you can transform ordinary craft materials into a mind-bending mechanical labyrinth. Whether you want to challenge your kids on a rainy afternoon or create an elegant wooden heirloom for a friend, building a custom vault is an affordable and rewarding weekend project.
Why Building a Homemade Brain Teaser Box is a Perfect Project
Many traditional crafting projects result in objects that simply sit on a shelf collecting dust. A smart wooden build breaks that cycle by providing ongoing, interactive value long after the initial building process is complete. It challenges the mind of anyone who encounters it, turning a static decorative object into a living game. If you want to dive deeper into the world of logic games, check out our Riddlespuzzle homepage for endless inspiration. Once your box is complete, pairing it with a set of clever riddles inside the hidden compartment takes the gifting experience to an entirely new level.
Choosing to make your own puzzle box also allows you to customize the puzzle narrative completely. If you are creating a gift, you can design the unlocking mechanism around personal inside jokes, meaningful dates, or specific milestones. The process forces you to look at everyday materials through the lens of mechanical engineering, giving you a deep appreciation for alignment, friction, and spatial logic.
The Materials: Choosing the Right Base for Your Build
You do not need an expensive workshop filled with industrial power tools to create a functional mechanism. The trick is selecting materials that match your current skill level while ensuring the final structure remains smooth and rigid.
Budget-Friendly Cardboard and Foam Boards
For beginners or younger crafters, heavy-duty chipboard or foam-core board provides an excellent foundation. These materials are incredibly easy to cut with a standard utility knife and can be bonded instantly using a standard hot glue gun, making them perfect for fast, iterative designs.
High-Quality Baltic Birch Plywood
If you want to build a durable, long-lasting project, thin Baltic birch plywood is the gold standard for unique craft puzzle ideas. Plywood ranging from one-eighth of an inch to one-quarter of an inch thick is incredibly stable, resists warping over time, and can be easily shaped using a basic hand coping saw or a desktop laser cutter.
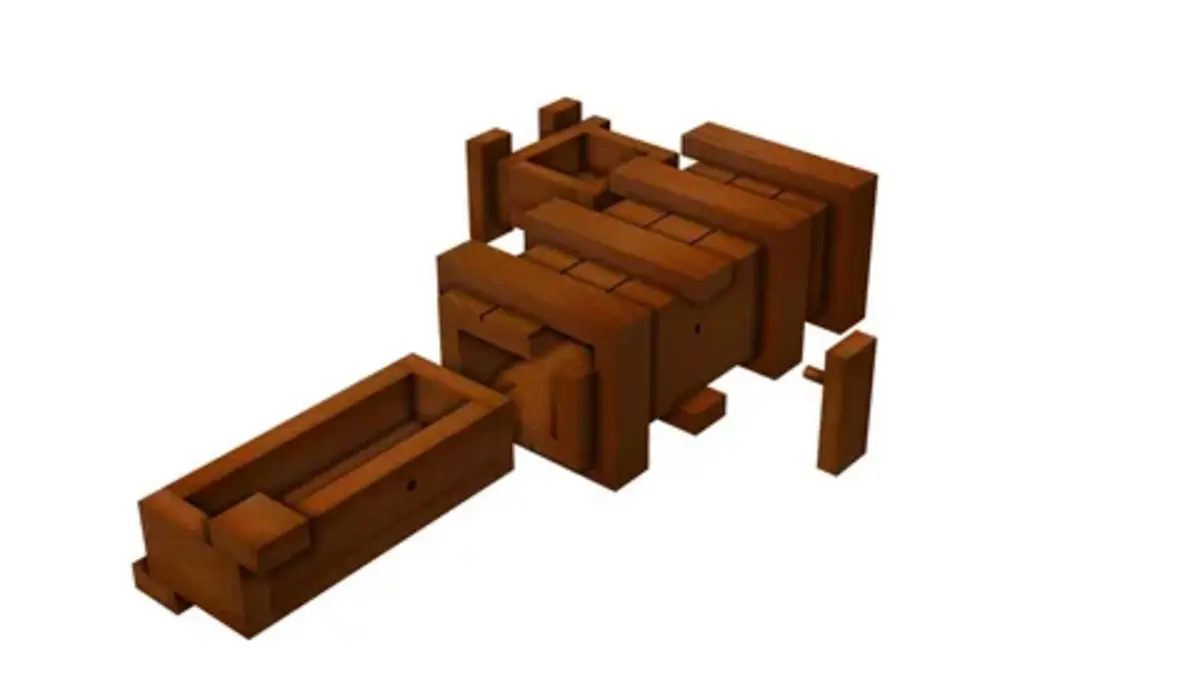
Step-by-Step Guide to Crafting a Three-Step Locking Box
This specific design utilizes an interlocking sliding panel mechanism. The user must slide the panels in a precise sequence to release the main latch and expose the inner compartment.
Mechanical Comparison of Common DIY Lock Designs
Understanding how different internal mechanisms operate makes it easier to brainstorm your custom creations. Selecting the right lock type defines the overall user experience and complexity of your build.
| Mechanism Style | Difficulty to Build | Best Base Material | Core Unlocking Action | Keyword Focus |
| Sliding Panel Lock | Low to Medium | Plywood or Acrylic | Sequential lateral slides | diy puzzle box |
| Gravity Pin Lock | Medium | Hardwood or MDF | Inverting the box structure | homemade brain teaser box |
| Magnetic Latch | Low | Foam Board or Cardboard | Passing a magnet over a spot | make your own puzzle box |
| Internal Maze Track | High | Dense Craft Wood | Navigating a hidden pin route | craft puzzle ideas |
Crucial Alignment and Friction Management Standards
The biggest pitfall when building a functional homemade brain teaser box is failing to account for material friction and moisture expansion. If your tolerances are too tight, a change in humidity can swell the wood fibers and lock the box permanently.
The Golden Rule of Mechanical Tolerance: Always sand your moving internal channels and sliding rails with ultra-fine two hundred and twenty grit sandpaper until they feel smooth to the touch. Apply a generous layer of natural beeswax or a basic paraffin candle wax along the high-friction tracks before final assembly. This lubrication ensures your moving panels glide effortlessly without sticking or jamming.
Furthermore, always maintain a small structural clearance gap of roughly one-thirty-second of an inch between your moving exterior panels. This tiny buffer space accounts for natural wood movement, prevents paint layers from scraping against each other, and hides the secret seams from eager eyes.
Finishing Touches: Decorating to Hide the Seams
The ultimate goal of a successful mystery container is deception. If the seams and joints of your sliding elements are highly visible, the solution becomes obvious to the user instantly, ruining the challenge.
-
Incorporate busy geometric surface patterns: Use intricate stencils, wood-burning tools, or busy decorative wrapping paper to cover the exterior faces. Complex patterns break up the visual field, making the tiny gaps of your sliding panels completely invisible.
-
Add decorative false hardware elements: Install non-functional metal hinges, brass corner brackets, or stationary metallic rivets to different areas of the exterior. This misdirection draws the eye away from the true mechanism and tricks the user into pulling on parts that do not move. This art of misdirection is the same psychological principle that makes story-based brain teasers so addictive and satisfying to solve.
-
Distress the final surface layers: Use dark wood stains, antiquing waxes, or chalk paint to give your creation an aged, weathered look. A rustic finish naturally masks any minor structural imperfections or uneven cuts made during your build process.
Conclusion
Building a diy puzzle box is an exceptional way to merge hands-on crafting with creative cognitive design. By turning simple materials like plywood or cardboard into an intricate, secret compartment, you build a rewarding physical challenge that delights anyone who tries to open it.
When you organize your workshop and start your first build layout, remember that patience and accurate measurements are the secrets to a flawless mechanism. Rather than rushing to create highly complex multi-step vaults right away, start by mastering a simple sliding panel or a basic hidden pin setup. Use clever surface decorations to mask your moving tracks, and test the friction paths frequently before applying final finishes. To see how these physical puzzles mentally stimulate your brain compared to digital games, read this independent cognitive study on logic puzzles for fascinating breakdown data. Skip the generic store-bought gifts on your next holiday list and craft an unforgettable, interactive mystery box instead.
Frequently Asked Questions
What are the best tools for a beginner making a diy puzzle box?
If you are just starting out with cardboard or foam, a sharp utility knife, a metal straight-edge ruler, and a hot glue gun are all you need. For wood-based builds, invest in a lightweight hand coping saw, a bottle of quality wood glue, and varying grits of fine sandpaper to keep your moving channels incredibly smooth.
How do I make my homemade brain teaser box more difficult?
You can increase the difficulty by adding sequential dependencies. This means designing the internal blocks so that panel A cannot move until panel B is shifted, which cannot move until hidden pin C is pulled. Forcing the user to move parts in a specific linear order dramatically escalates the challenge.
Can I build a secure lock without using metal screws or hinges?
Yes. The vast majority of traditional Japanese secret boxes rely entirely on interlocking wooden slide tracks and friction fit dovetails. Wooden dowels, bamboo skewers, and clever joinery can easily create incredibly strong and complex locking systems without a single piece of metal hardware.
How do I prevent people from forcing the box open with raw strength?
The easiest defense is using lightweight, delicate-looking exterior materials or adding explicit written warnings. You can also design the mechanism so that pulling with excessive force actually locks the internal pins deeper into their matching slots, protecting the inner contents from being forced open.
Where can I find free design templates to make your own puzzle box?
You can discover a vast array of downloadable cutting patterns, step-by-step assembly videos, and inspirational layouts by visiting dedicated hobbyist communities, open-source maker spaces, and comprehensive online puzzle hubs like riddlepuzzle.com.