What if the biggest thing standing between a small shop and more sales isn’t the product, the price, or the shipping, but the photo? That blurry phone snapshot of a handmade candle on a cluttered kitchen table is quietly costing sales every single day. The good news is that small businesses no longer need a studio, a lighting crew, or a five-figure budget to produce clean, trustworthy product images. The tools have gotten cheaper, smarter, and far more forgiving.
This guide walks through the gear, software, and practical habits that actually move the needle for small teams. It skips the hype and focuses on what holds up when a business owner is shooting twenty products on a Tuesday afternoon with a phone and a folding table.
Start With Light, Not With a Fancy Camera
The most common mistake small businesses make is buying a camera before they understand light. A modern smartphone with a “pro” or manual mode and RAW capture can produce web-ready product photos, especially when the lighting is controlled. The camera body matters far less than most people assume. Soft, diffuse light reduces harsh shadows and shiny hotspots on glossy products, and that single principle does more for image quality than any upgrade.
Practical options that work:
- A window with a scrim. Hang a thin white sheet or diffusion fabric over a bright window. This gives free, soft, directional light that flatters almost everything.
- A light tent or light box. These diffuse light from several sides and are a low-cost staple for small, reflective items like jewelry, glassware, and cosmetics.
- Two softboxes or LED panels with diffusers. A simple two-light setup, one key light and one fill, gives repeatable results and lets a business shoot after dark.
- Bounce cards. A sheet of white foam board on the shadow side fills in dark areas for a few dollars.
The trap here is over-lighting. Too many lamps create multiple shadows pointing in different directions, which looks unnatural and confusing. One clear light source, softened, plus a bounce, usually beats a pile of cheap lamps.
The Gear That Earns Its Place
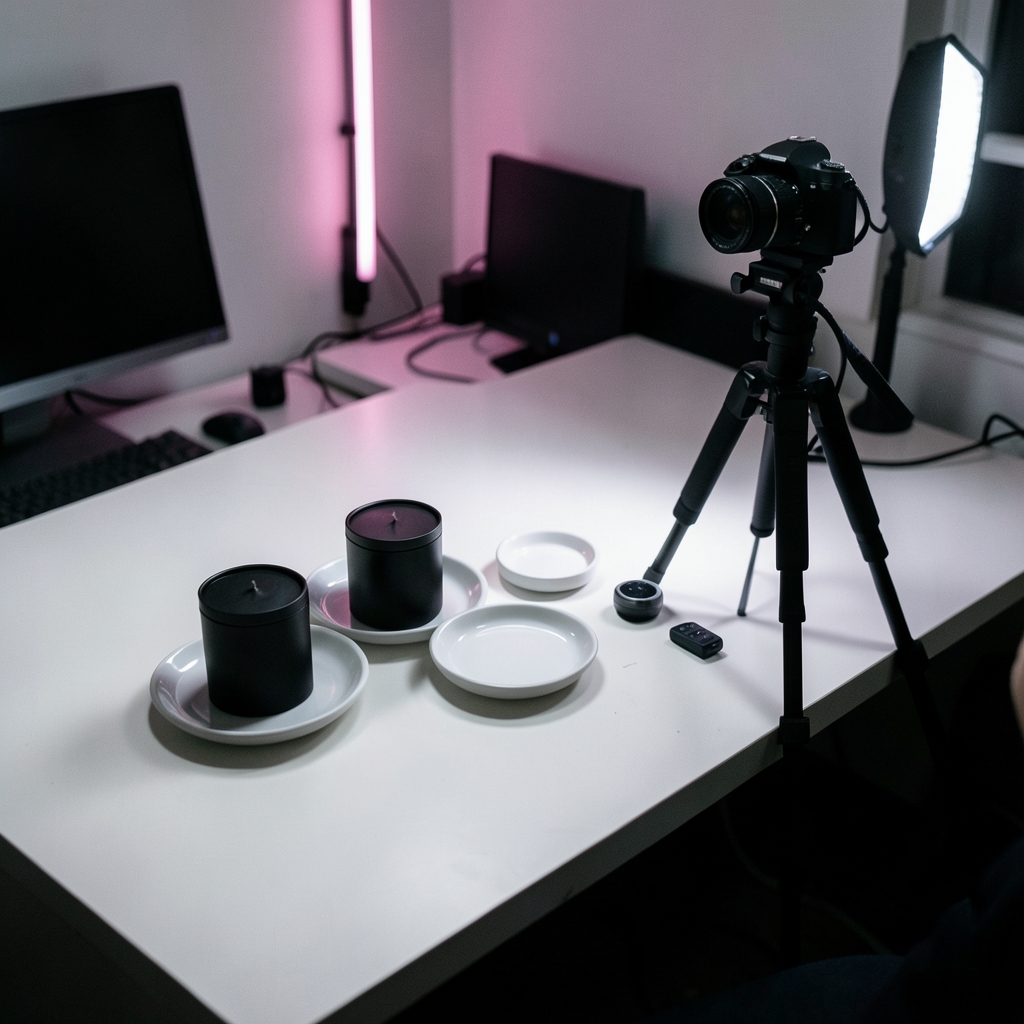
Once lighting is sorted, a few inexpensive accessories do the heavy lifting.
| Tool | What it solves | Who needs it most |
|---|---|---|
| Tripod or phone clamp | Shake, inconsistent framing | Anyone shooting a catalog |
| Remote shutter or interval mode | Blur from tapping the screen | Batch shooters, low light |
| Gray card or white-balance reference | Color casts, mismatched whites | Sellers with colored products |
| Light tent | Harsh reflections on glossy items | Jewelry, glass, cosmetics |
| Plain backdrop or sweep | Distracting backgrounds | Apparel, home goods |
| Reflector or foam board | Dark shadows on one side | Nearly everyone |
A tripod plus a remote or interval shooting mode reduces shake and speeds up batch shots, which matters when a seller needs consistent images across an entire catalog. Consistency affects more than appearance. Uniform framing, background, and lighting across a catalog support brand trust and make a storefront look intentional rather than improvised.
Software: Where Most of the Magic Happens
Editing is where small businesses often overspend or underinvest. The right answer depends on volume and skill, not on the biggest brand name.
Free and open-source options cover a surprising amount of ground. GIMP handles layers, retouching, and background cleanup, and darktable offers a full RAW workflow with color management. For a business watching every dollar, these are legitimate tools, not toys. The tradeoff is a steeper learning curve and fewer guided workflows.
Paid editors like Adobe Photoshop and Lightroom bring faster retouching, batch presets, and tighter integration with RAW files. Lightroom’s preset system is genuinely useful for keeping a whole catalog looking like it came from one brand. Pricing and feature sets change often, so check current vendor pages before committing rather than trusting an old blog post.
Background removal has become largely automated. Many tools offer one-click cutouts, and the quality has climbed fast. The caveat is edge complexity. Hair, transparent glass, and mesh fabric still trip up automated cutouts, and those products often need a manual pass. For simple shapes on solid backgrounds, automation saves hours.
A Simple Editing Workflow That Works
- Correct white balance first. Use a gray card reference or the white point of a neutral object. Fixing color after cropping and retouching means redoing work.
- Crop to a consistent ratio. Pick one framing rule for the catalog and stick to it.
- Clean the background. Remove dust, stray fibers, and distracting edges.
- Adjust exposure and contrast gently. Over-edited images look plastic and erode trust.
- Export at the right size and format. Follow each platform’s published image specifications rather than guessing.
- Add alt text. Text alternatives for images are an accessibility requirement, and they help search visibility too.
That last step gets skipped constantly. Alt text is not decoration. It is how a product image is understood by screen readers and by search engines, and it takes ten seconds per photo.
Choosing Tools by Business Type
Not every small business needs the same stack. A jeweler and a furniture maker have almost nothing in common in their photography needs.
| Business type | Priority | Sensible stack |
|---|---|---|
| Jewelry and accessories | Reflections, macro detail | Light tent, tripod, macro clip lens, manual background removal |
| Apparel | Fit, drape, consistent model or mannequin | Plain backdrop, two lights, batch presets |
| Cosmetics and glass | Glossy highlights, label legibility | Diffused lighting, polarizing filter, careful retouching |
| Home goods and furniture | Scale, styling, lifestyle context | Larger backdrop, natural light, wide-angle care |
| Food and consumables | Freshness, texture, color accuracy | Daylight-balanced lighting, gray card, fast turnaround editing |
The pattern is that the tool list follows the product’s hardest problem. Buy for the problem, not for the category.
Where Product Photography Fits in the Wider Business
Product photos do not exist in a vacuum. They feed listings, ads, social posts, and email campaigns. Small businesses that treat photography as part of a larger marketing system get more from every shoot.
For example, a business that already uses social media management tools for small businesses can repurpose a single shoot into weeks of posts, stories, and carousel content. The photos become raw material rather than a one-off expense.
Similarly, teams capturing video alongside stills often lean on practical AI video editing tools for small businesses to turn behind-the-scenes clips into short product demos. And when a shoot includes an owner talking through the product, AI transcription tools that actually work for small businesses can turn that audio into captions, listing copy, and FAQ content.
The point is leverage. A well-planned photo session produces stills, video, and text if the business plans for it. A poorly planned one produces a folder of images nobody uses.
Common Mistakes That Undo Good Tools
Even with decent gear, small businesses repeat the same errors.
Shooting on auto with mixed lighting. A desk lamp plus overhead fluorescent plus a window creates three color temperatures in one frame. No editor fixes that cleanly.
Ignoring monitor calibration. Color accuracy depends on white balance and on the display used for editing. An uncalibrated monitor makes a seller chase colors that look wrong to customers. A gray card helps, and periodic monitor calibration closes the gap between edit and reality.
Over-cleaning the product. Removing every imperfection makes real items look synthetic. Buyers notice, and returns rise when the product does not match the photo.
Skipping consistency. One photo on white, one on wood, one outdoors. The catalog looks like a yard sale rather than a brand.
Forgetting platform specs. Marketplaces and site builders publish image size and format requirements, and those specs change. The platform’s own help pages are the authority, not a random tutorial from three years ago.
No naming convention. A folder of files called IMG_4471 makes repurposing miserable. Name files by product and variant from the start.
What Actually Works in Practice
The businesses that get the most from product photography tend to share a few habits. They shoot in batches, setting up once and working through many products. They keep a written shot list so nothing gets missed. They build a simple, repeatable setup they can recreate in twenty minutes. And they edit with restraint, favoring accurate color over dramatic looks.
They also test. A seller can swap one hero image and watch whether add-to-cart rates move before rolling the change across a catalog. That is more reliable than trusting a vendor’s claim about conversion lift, which is usually marketing rather than independent evidence.
Finally, they treat accessibility as part of quality. The Web Content Accessibility Guidelines, maintained by the World Wide Web Consortium, set out requirements for text alternatives to images. Following them is both a legal safeguard in many markets and a genuine usability improvement.
Conclusion
The best product photography tools for small businesses are not the most expensive ones. They are the ones a business will actually use consistently: a phone with manual controls, soft diffused light, a tripod, a gray card, and an editor matched to the team’s skill and volume. Free tools like GIMP and darktable can carry a small operation a long way, while paid editors earn their keep through speed and batch workflows. Automated background removal handles the simple products, and manual work handles the tricky ones.
The through-line is discipline over gear. Controlled light, consistent framing, honest editing, correct export specs, and alt text on every image will outperform a fancy camera used carelessly. Start with one product, one light source, and one clean background. Then build the catalog from there.
Frequently Asked Questions
Can a phone really replace a dedicated camera for product photos?
For most small businesses selling online, yes. A modern smartphone with manual or pro mode and RAW capture produces web-ready images when the lighting is controlled. A dedicated camera helps with very large prints, extreme macro work, or fast-moving subjects, but it is rarely the first upgrade worth making.
How much should a small business spend on a starter setup?
Less than most expect. A tripod or phone clamp, a diffusion source, a white foam board, and a gray card cover the essentials. Software can start free with open-source editors. The bigger investment is time spent learning light and building a repeatable setup.
Why do my product photos look different from what I see in real life?
Color accuracy depends on white balance and monitor calibration. Mixed lighting sources create color casts that are hard to fix later, and an uncalibrated monitor makes editing guesswork. Use a gray card for white balance and calibrate the display periodically so edits match what customers see.
Is automated background removal good enough for professional listings?
Often, yes. One-click cutouts handle simple shapes on solid backgrounds well. The exceptions are hair, transparent glass, and mesh fabric, where edges get messy and a manual pass is still needed. Test the tool on your hardest product before trusting it across a catalog.
How do I keep a large catalog looking consistent?
Pick one framing ratio, one background, and one lighting setup, then document it. Shoot in batches with a written shot list, and use presets or saved edits to apply the same look across images. Consistency across a catalog supports brand trust more than any single dramatic photo.
What image size and format should I use?
Follow the platform’s own published specifications. Marketplaces and site builders maintain help pages with current size, ratio, and format requirements, and those change over time. Check the platform’s help center directly rather than relying on older tutorials.